Aomei Backupper Tutorial
Full System Backup
Why, What for…
A full image backup captures the whole filesystem, so that in the event of a hard drive failure, or total loss of the computer, the system can be restored entirely as it was at the time of the backup, even if restoring onto an entirely different computer.
We are going to focus on Aomei Backupper Free, as it is fairly generous in it’s free version and the backups are pretty maleable.
See the bottom on this article for a list of other backup software options.
Setup
Download Aomei Backupper Standard (free)
Download and install Aomei Backupper free
from: https://www.aomeitech.com/ab/standard.html
Skip the offer
Bypass and skip all of the upgrade offers. 
Install

Backup
In order to make a first backup, make sure you have access to another store drive or network location that has enough available storage.
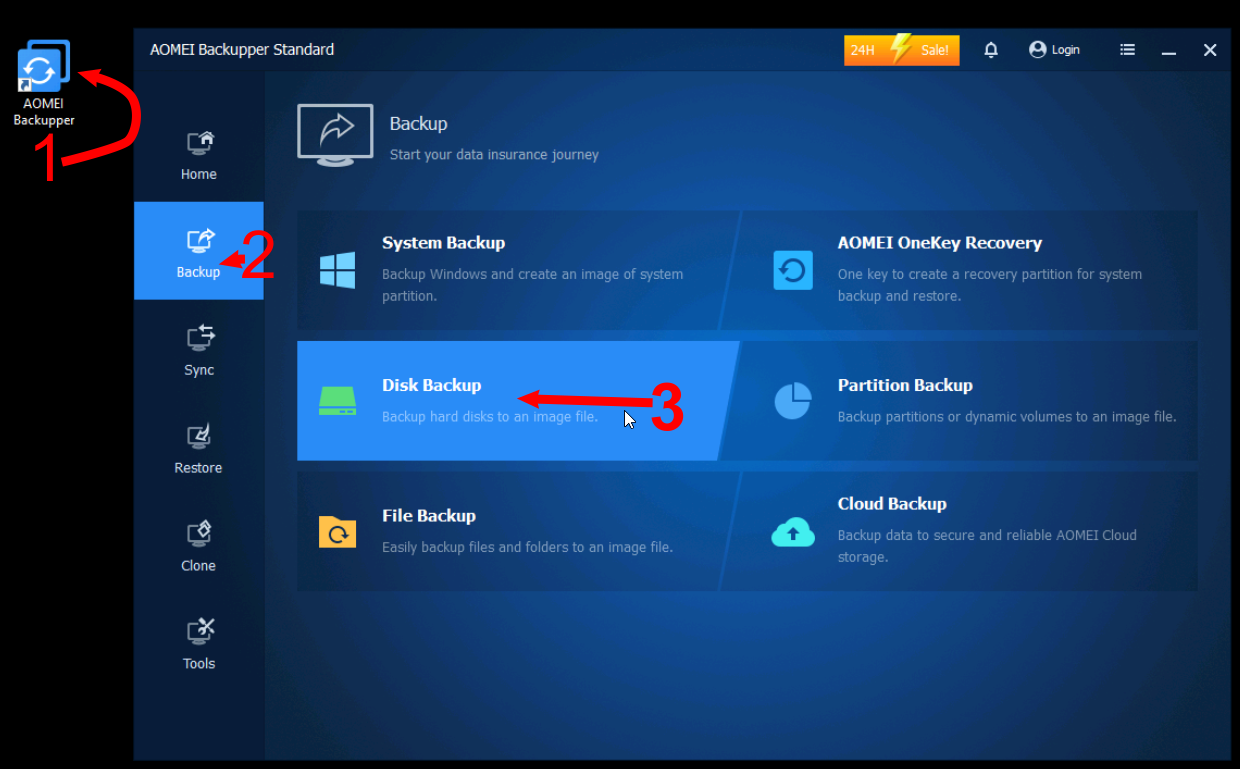
Start Aomei Backup
- Open Aomei backupper
- Select Backup, then
- Select Disk Backup
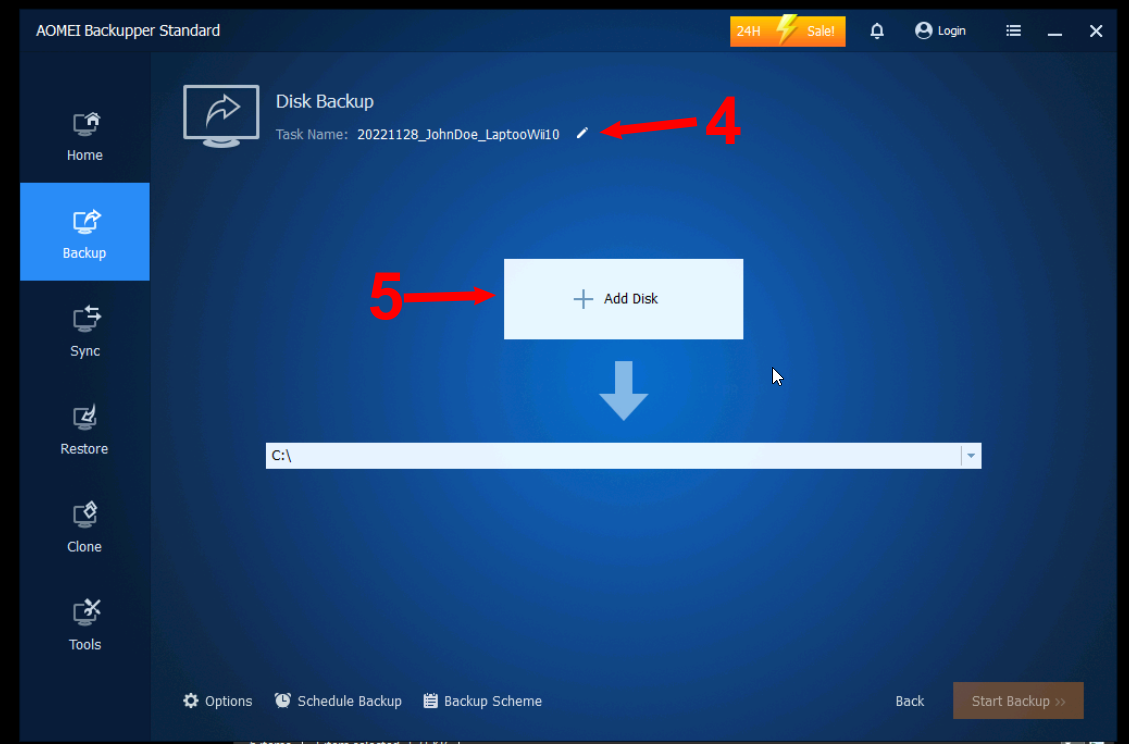
Set the Backup Name and Source
- Click the small pencil next to Task name and, name your backup, I would recommend using a format like: YYYYMMDD_BackupName, ie:
20221128_JohnDoeLaptopWin10 Click Add Disk.
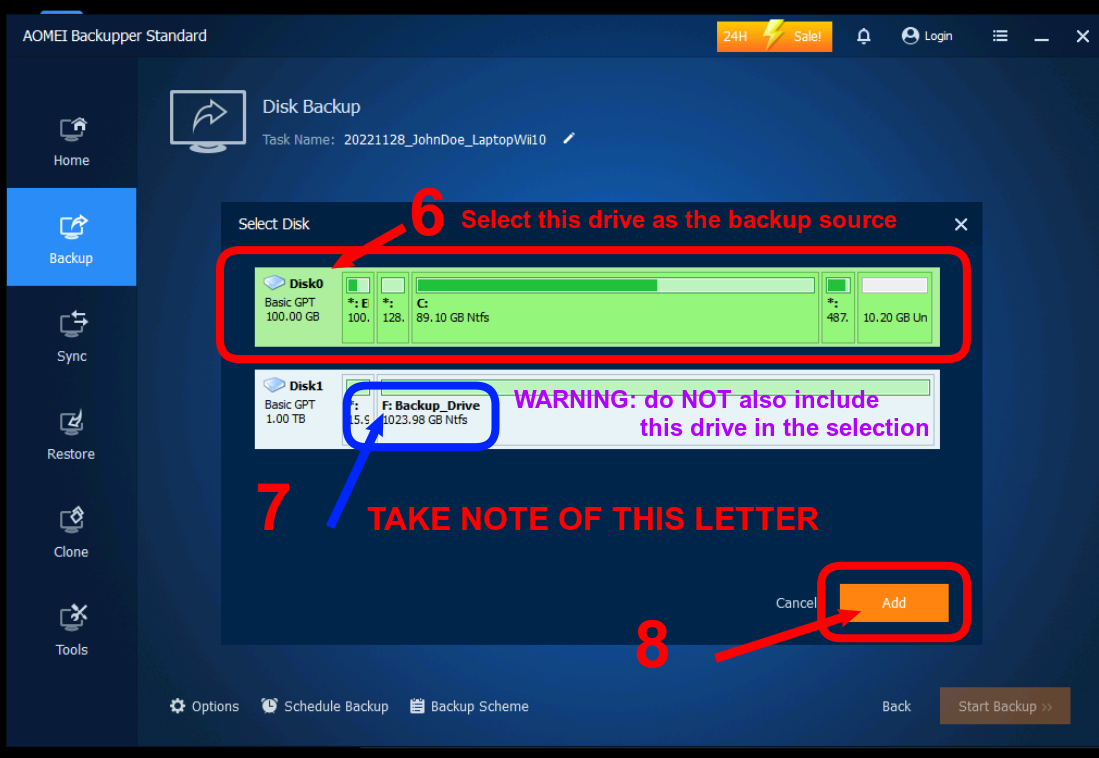
- Select the Disk that is going to be the source of the backup (in most cases it will be Disk0)
- Make a note of the drive letter for the Backup destination, in our example it is drive F:
- Click Add
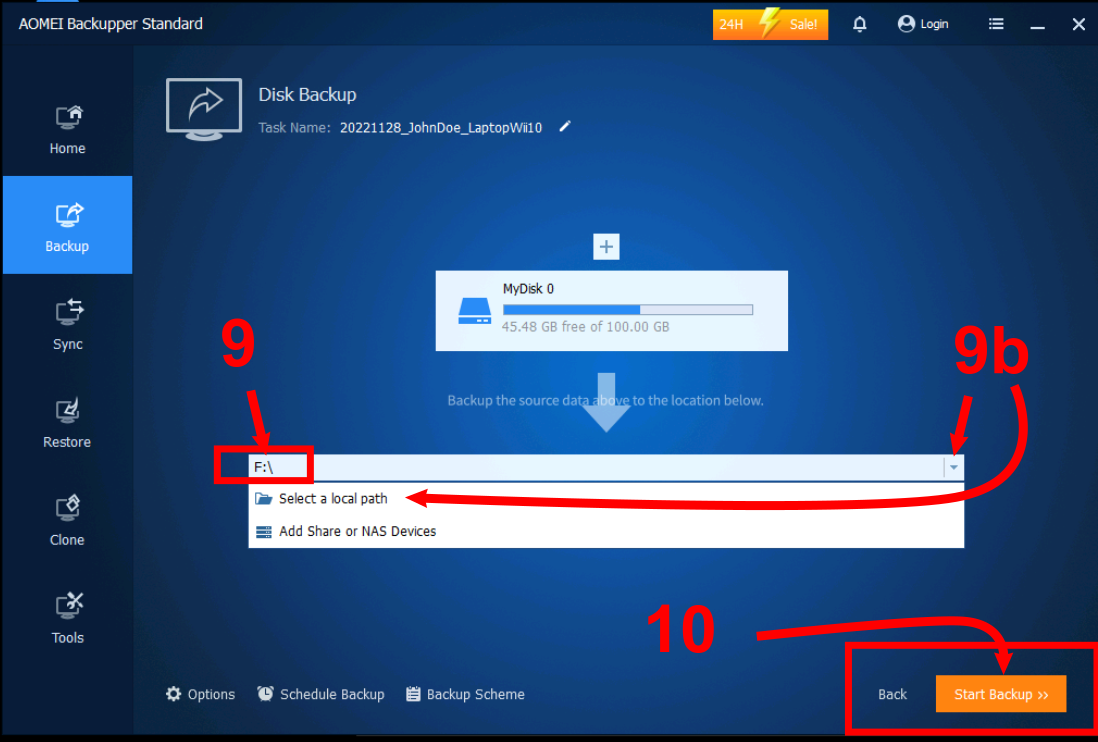
Set the Destination and Start
- Select the Destination Path
[! Info] In most cases the drive letter will be correct.
[! Warning] 9b. If the drive letter is incorrect,
click the drop down
and select the proper location from
the local path or network share. - Click Start Backup
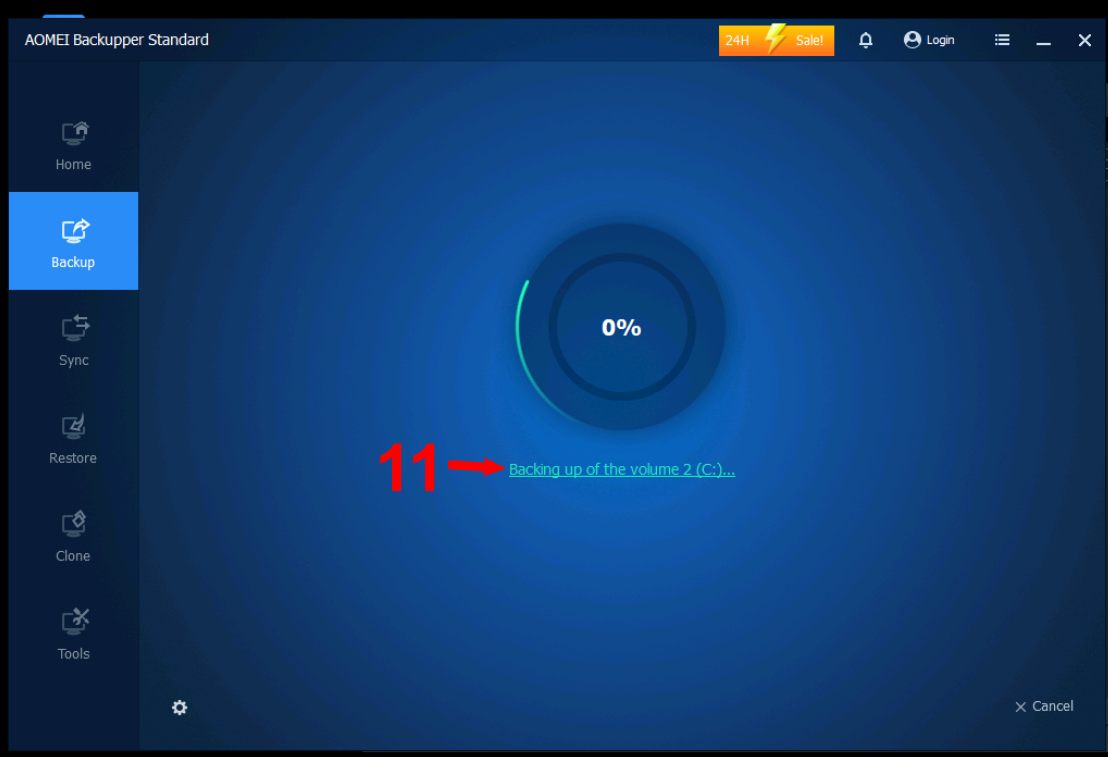
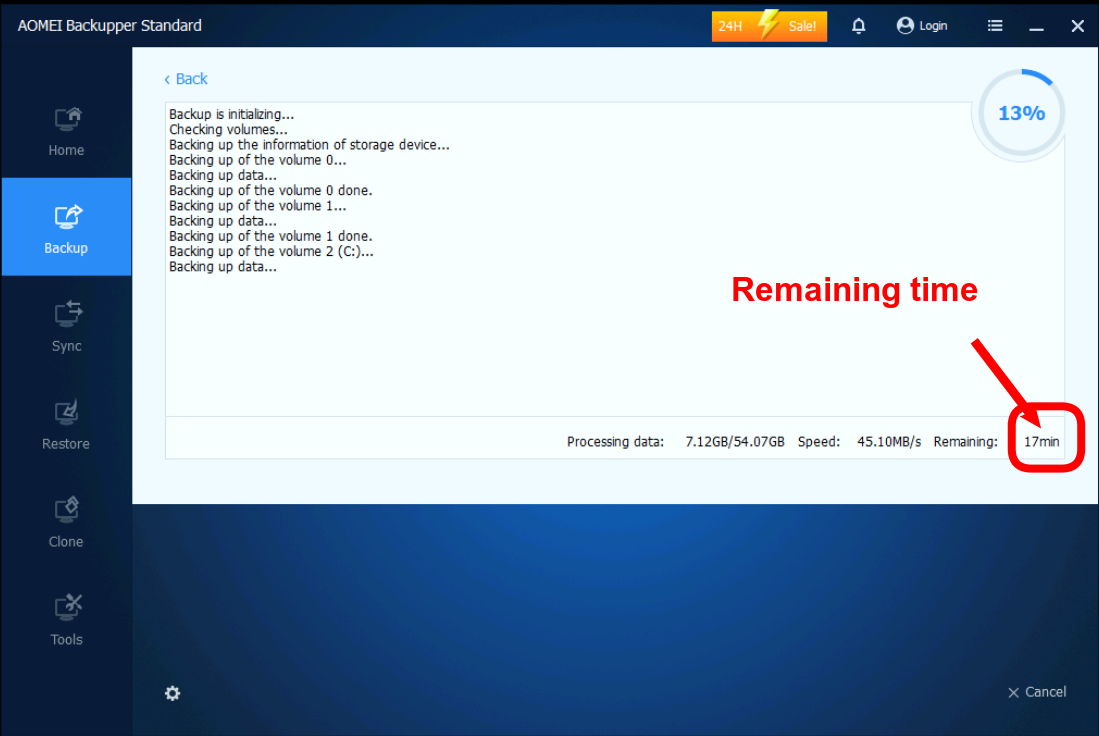
Check Progress
- To view more information about the Backup, including the finish time click the link below the backup progress indicator.
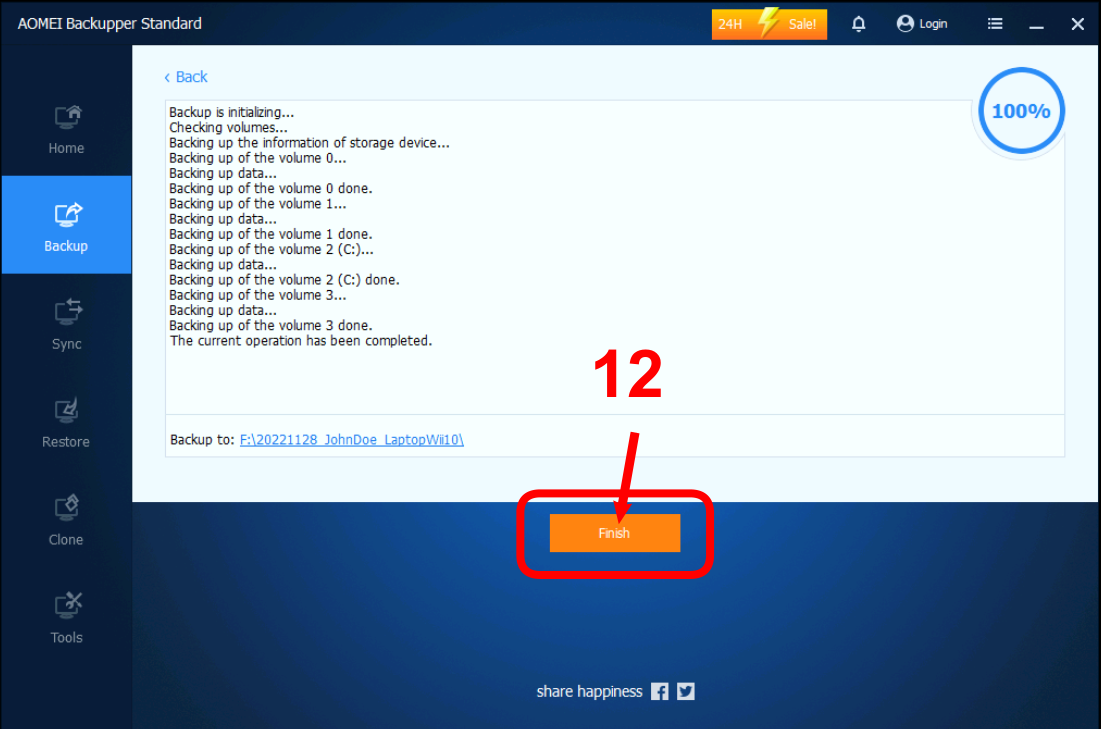
Finish and Eject
- When the backup is done, click Finish.
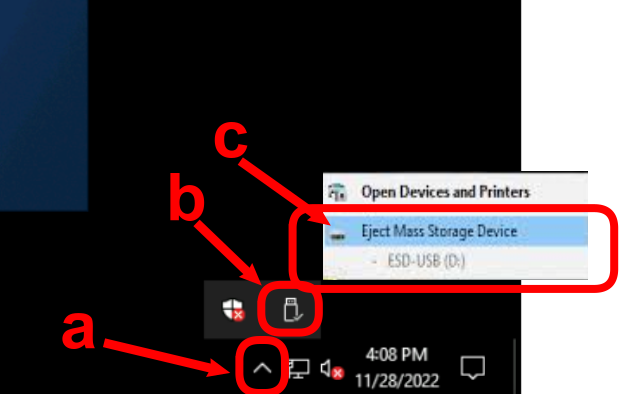
[! Info] Remember to Eject the drive if it is a USB Device.
a. click the system tray option to show more icons.
b. find the icon for USB devices.
c. Select the Eject option above the correct device.
Software
List of other Full Image Backup Software
There are many programs out there for capturing Full Image backups, some of them are:
| Name | Description | Free Option | Runs from Windows | restore to smaller drive |
|---|---|---|---|---|
| Aomei Backupper: | This has a rather generous free version | ✓ | ✓ | ✓ |
| Macrium Reflect free. | Allows you to easily back up your entire computer, make accurate and reliable images of your HDD or individual partitions and schedule backups. | ✓ | ✓ | ✓ |
| Paragon Backup & Recovery Free | It supports all major features, including file, partition/disk and entire computer backups, scheduled backups, incremental and differential backups, and more. | ✓ | ✓ | ✓ |
| Clonezilla: | This is free and open source, however it is not possible to restore backups onto smaller drives, it can backup, restore and clone Linux, Windows, and raw drives. | ✓ | 🗴 | 🗴 |
| Rescuezilla | An open source backup solution that is fully compatible with clonezilla, and has a graphical interface, however is more limited in featues. It is also operating system agnostic. | ✓ | 🗴 | 🗴 |
| Windows Backup: | This comes with windows, however it can be complicated to restore an image onto a smaller drive than the source. | ✓ | ✓ | 🗴 |
| Acronis: | This has been an industry standard. However they don’t offer an easily accessible free product, and there has been a perceived reduce in feature attention over the years. | 🗴 | ✓ | ✓ |